As announced previously, the upcoming 0.9.7 version of the Profiler represents a milestone in the development road map. We’re excited to present to you an awesome set of new features. In fact, the ground to cover is so vast that one post is not nearly enough. Throughout this week I’ll write some posts to cover the basics and this will allow for enough time to beta test the new version before reaching a release candidate.
Let’s start with an awesome image:
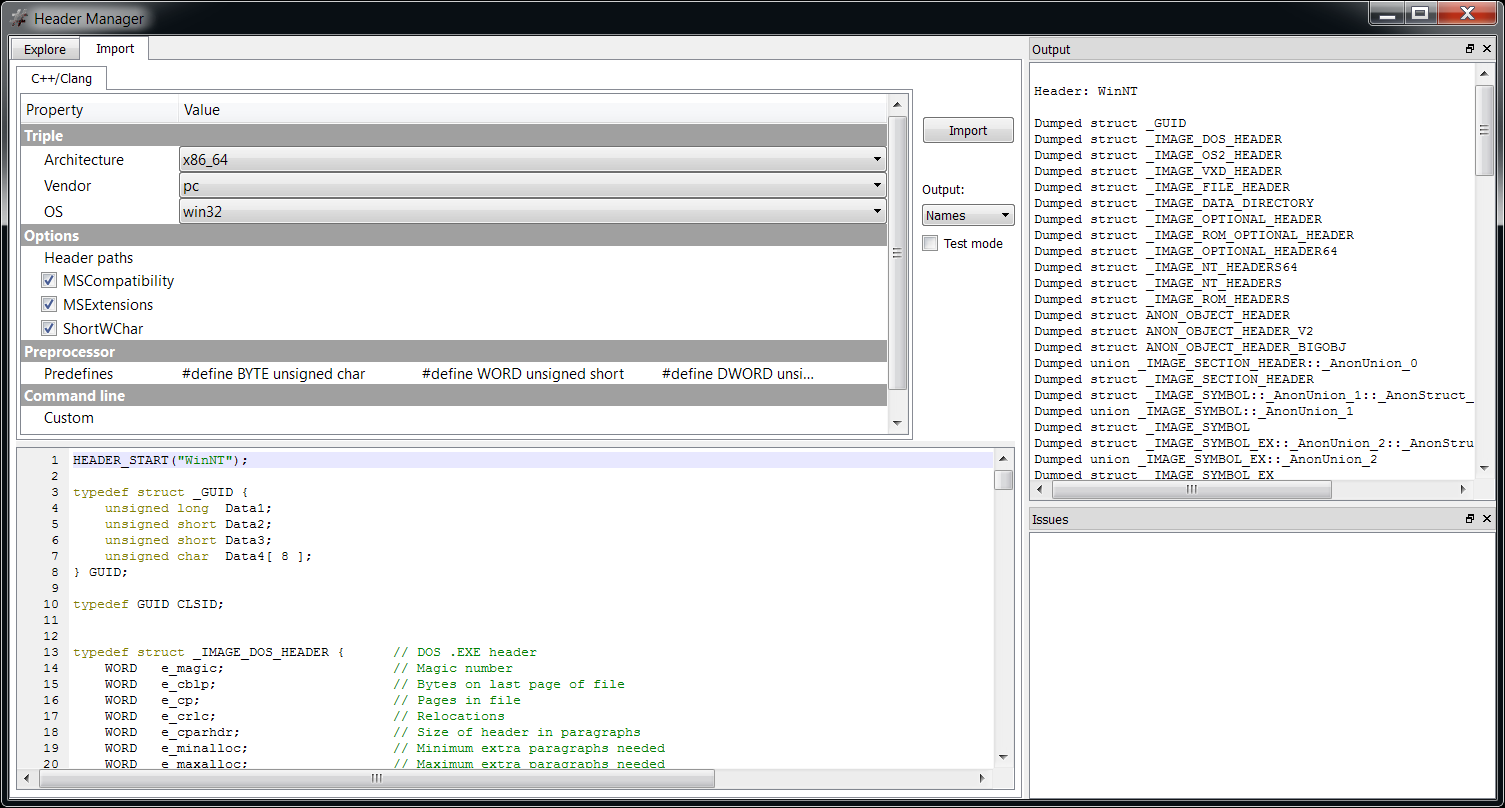
Does it look like a Clang based tool to parse C++ sources and extract type information? If yes, then that’s exactly it!
To sum it up very briefly, the Profiler is now able to extract C++ types such as classes and structures and use these types both in the UI and in Python.
Of course, there’s much more to it. The layout of C++ types is a complex matter and doesn’t just involve supporting simple data structures. This post is just an introduction, the next ones will focus on topics such as: endianness, pointers, arrays, sub-structures, unions, bit-fields, inheritance, virtual tables, virtual inheritance, anonymous types, alignment, packing and templates. Yes, you read correctly: templates. 🙂
And apart from the implications of C++ types themselves, there’s the SDK part of the Profiler which will also require some dedicated posts. In this introduction I’m going to show a very simple flow and one of the many possible use cases.
You probably have noticed that the code in the screenshot above belongs to WinNT.h. Let’s see how to import the types in this header quickly. Usually we could parse all the headers of a framework with a few clicks, but while Clang is ideal to parse both Linux and OS X sources, it has difficulty with some Visual C++ extensions which are completely invalid C++ code. So rather than importing the whole Windows SDK we just limit ourselves to a part of WinNT.h.
I have added some predefines for Windows types (we could also include WinDef.h):
#define BYTE unsigned char
#define WORD unsigned short
#define DWORD unsigned int
#define __int64 long long
#define LONG long
#define CHAR char
#define WCHAR short
#define ULONGLONG unsigned long long
#define UNALIGNED
#define SHORT short
#define NTAPI
#define VOID void
#define PVOID void *
#define BOOL unsigned int
#define BOOLEAN unsigned int
Then I just copied the header into the import tool. Usually this isn’t necessary, because we can set up the include directories from the UI and then just use #include directives, but since we need to modify the header to remove invalid C++ extensions, it makes sense to paste it.
The beginning of the code:
HEADER_START("WinNT");
typedef struct _GUID {
unsigned long Data1;
unsigned short Data2;
unsigned short Data3;
unsigned char Data4[ 8 ];
} GUID;
typedef GUID CLSID;
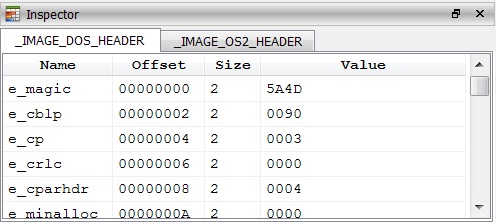
typedef struct _IMAGE_DOS_HEADER { // DOS .EXE header
WORD e_magic; // Magic number
WORD e_cblp; // Bytes on last page of file
WORD e_cp; // Pages in file
WORD e_crlc; // Relocations
WORD e_cparhdr; // Size of header in paragraphs
WORD e_minalloc; // Minimum extra paragraphs needed
WORD e_maxalloc; // Maximum extra paragraphs needed
WORD e_ss; // Initial (relative) SS value
WORD e_sp; // Initial SP value
WORD e_csum; // Checksum
WORD e_ip; // Initial IP value
WORD e_cs; // Initial (relative) CS value
WORD e_lfarlc; // File address of relocation table
WORD e_ovno; // Overlay number
WORD e_res[4]; // Reserved words
WORD e_oemid; // OEM identifier (for e_oeminfo)
WORD e_oeminfo; // OEM information; e_oemid specific
WORD e_res2[10]; // Reserved words
LONG e_lfanew; // File address of new exe header
} IMAGE_DOS_HEADER, *PIMAGE_DOS_HEADER;
// etc. etc.
Did you notice the HEADER_START macro?
HEADER_START("WinNT");
This tells our parser that the C++ types following this directive will be dumped into the header “WinNT.cphdr”. This file is relative to the header directory, a sub-directory of the user data directory. A HEADER_END directive does also exist, it equals to invoking the start directive with an empty string. To give you a better idea how these directives work take a look at this snippet:
// the types in A.h won't be dumped to a header file

#include

HEADER_START("BC");

// the types of B.h and C.h will end up in BC.cphdr
#include
#include

HEADER_END();

// what follows is not dumped to a header file
If you specify the “#” string in the start directive, the types which follow will be dumped to the ‘this’ header. This is a special header which lives in the current project, so that you can pass the Profiler project to a colleague and it will already contain the necessary types without having to send extra files.
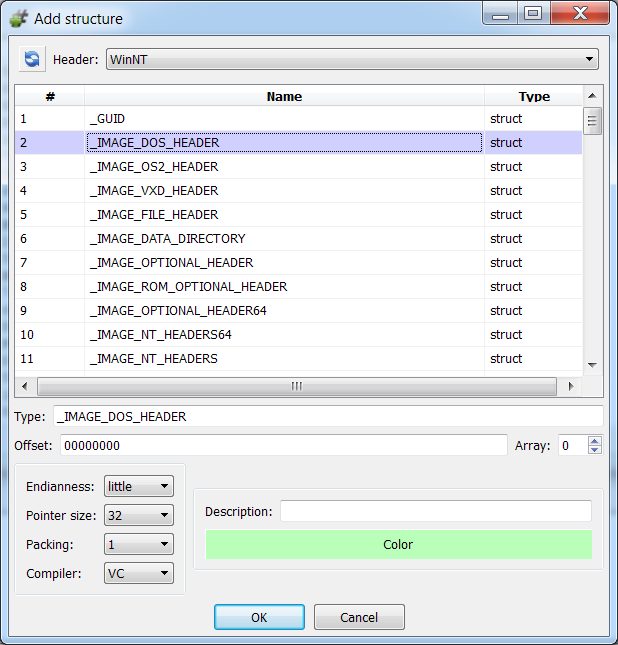
Back to the importing process, we click on ‘Import’ and that’s it. If Clang encounters C++ errors, we can fix them thanks to the diagnostic information:

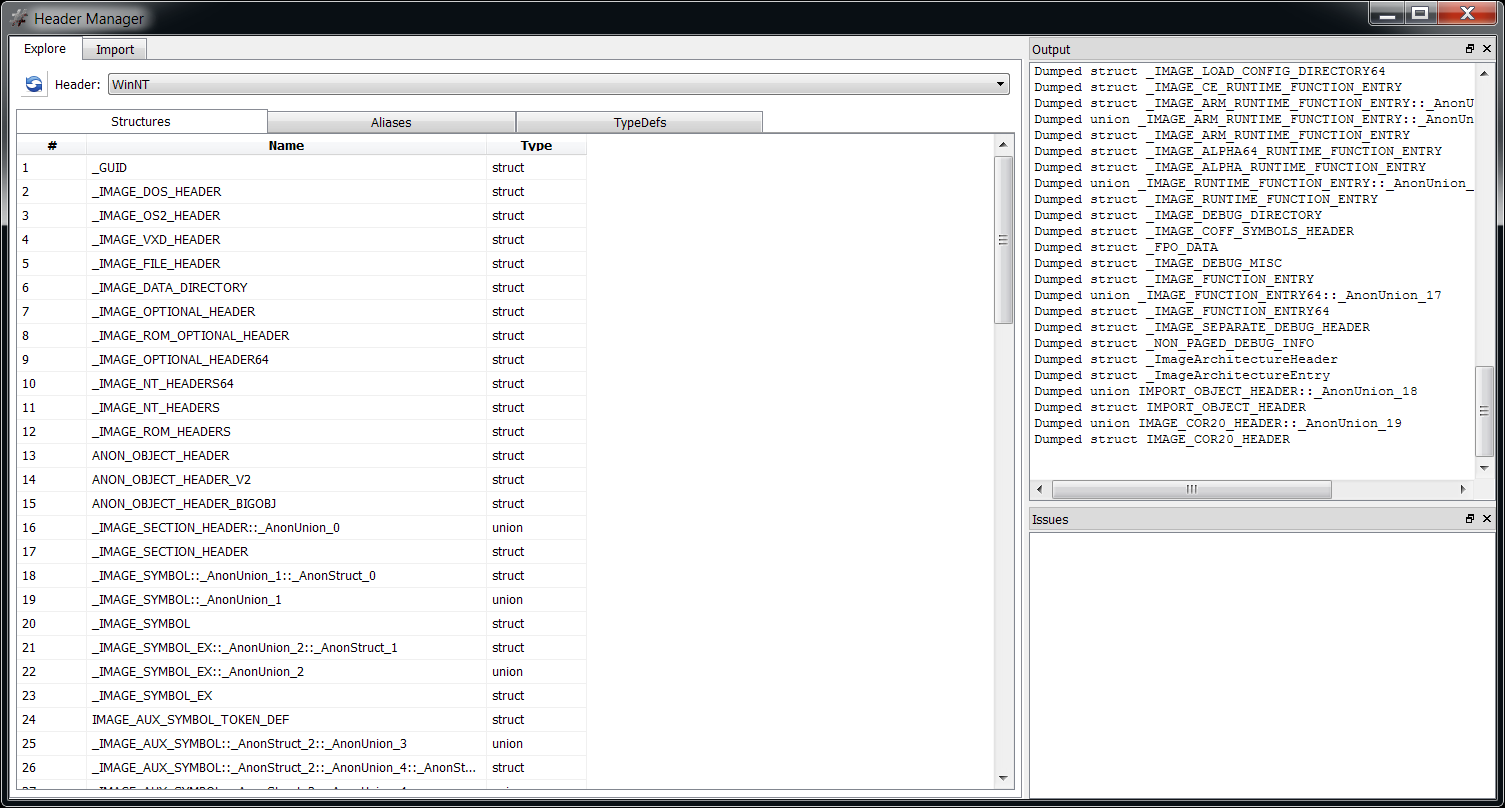
We can explore the created header file from the ‘Explore’ tab.
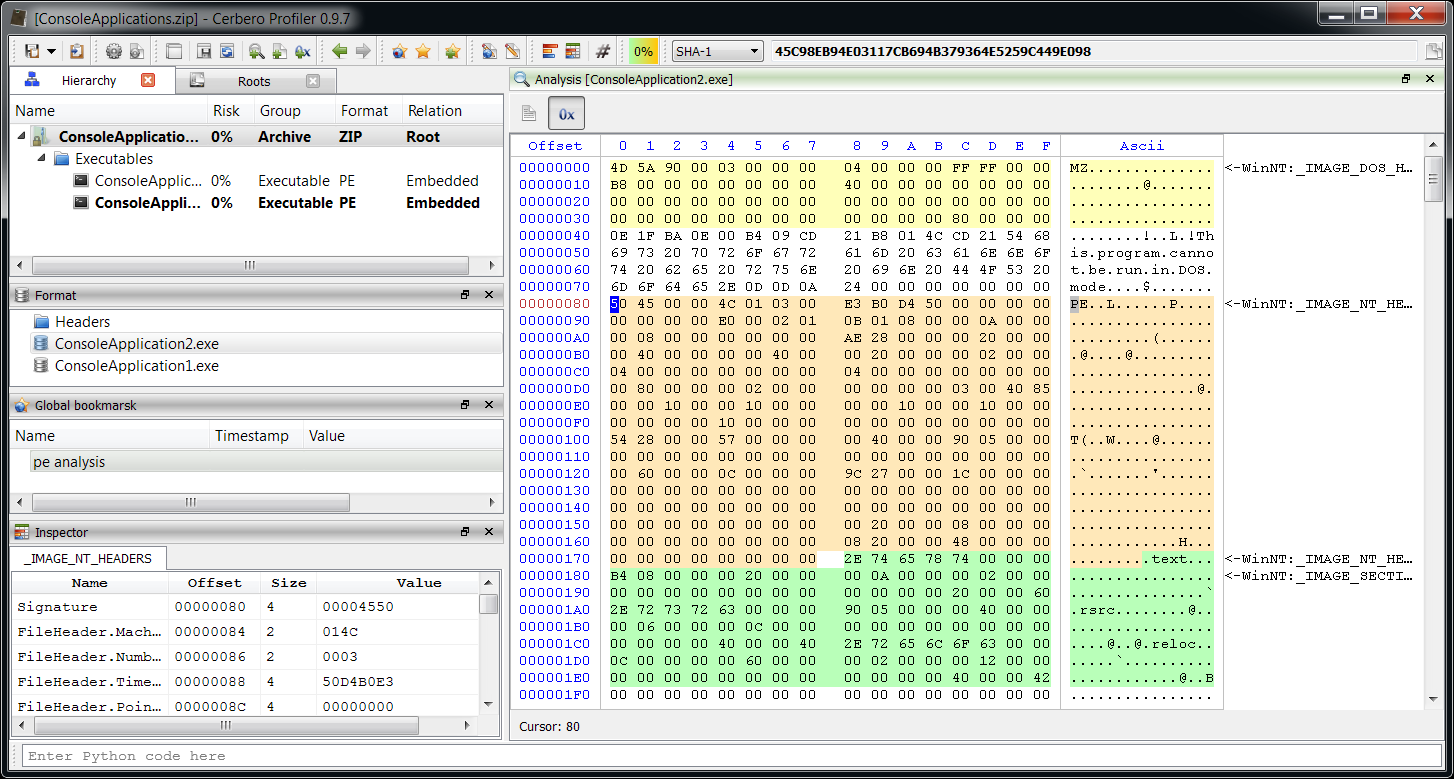
Now let’s use the header to analyze a PE file inside of a Zip archive.
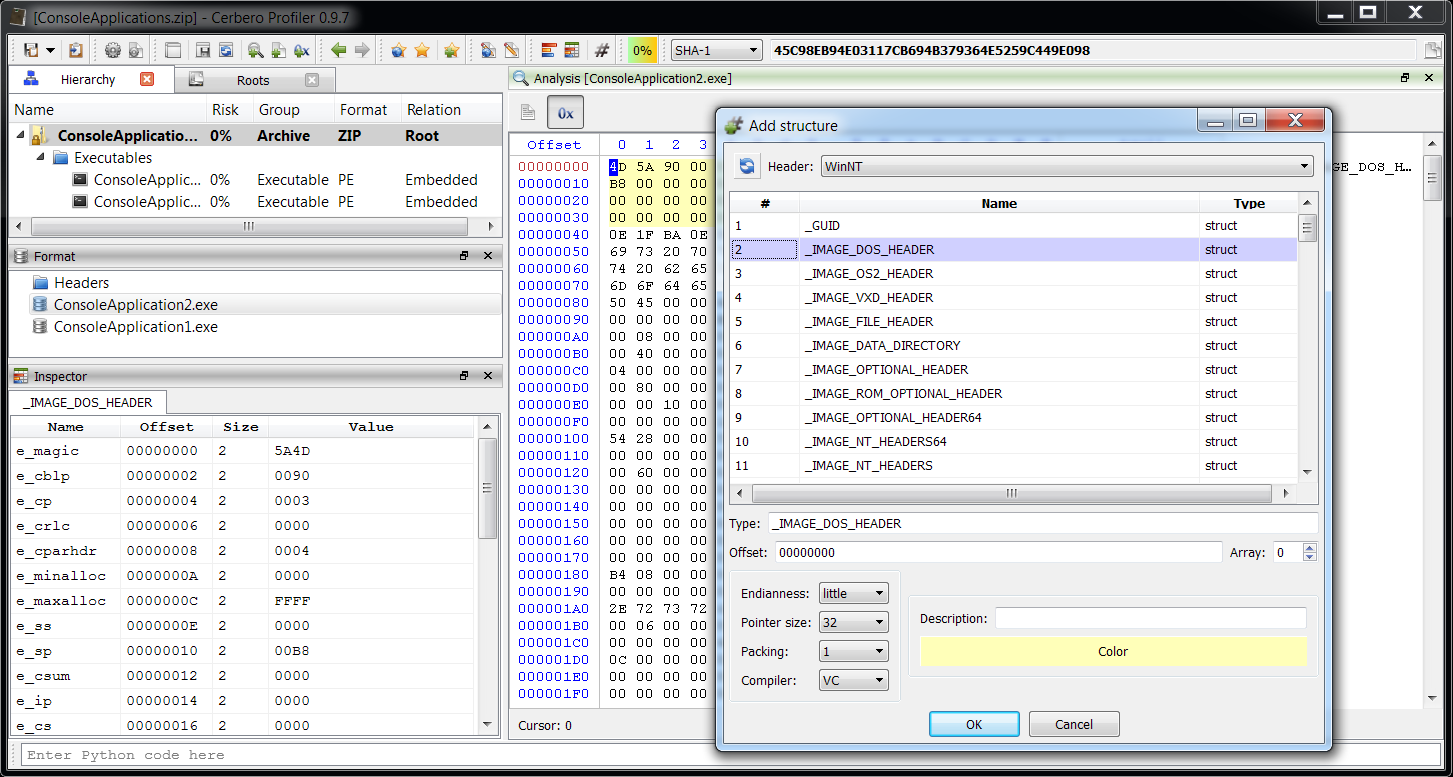
Please notice that I’m adding the types with a packing of 1: PE structures are pragma packed to 1.
What you see applied to the hex view, is a layout. In a layout you can insert structures or intervals (a segment of data with a description and a color).
A layout can even be created programmatically and be attached to a hex view as we’ll see in some other post. The implementation of layouts in the Profiler is quite cool, because they are standalone objects. Layouts are not really bound to a hex view: a view just chooses to be attached to a layout. This means that you can share a single layout among different hex views and changes will reflect in all attached views.
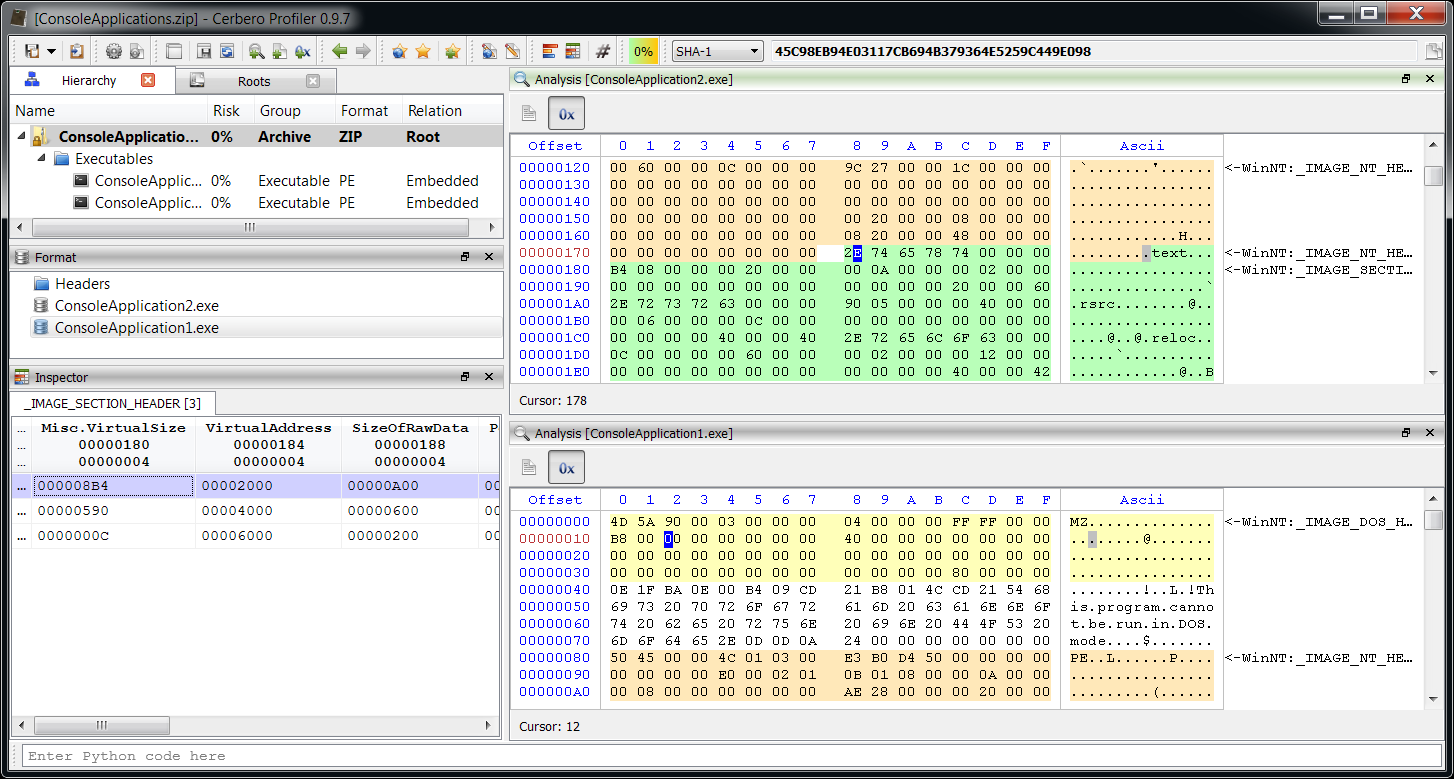
And while I didn’t mention it, the table view below on the left is the layout inspector. Its purpose is to let you inspect the structures associated to a layout at a particular position. Since layouts allow for overlapping structures, the inspector shows all structures associated in the current range.
But what if you go somewhere else and return to the hex view? The layout will be gone. Of course, you could press Ctrl+Alt+L and re-attach the layout to the view. There are other two options: navigate back or create a bookmark!
The created bookmark when activated will jump to the right entry and associate the layout for us. Remember that changing the name of a layout invalidates the bookmark.
That’s all for now. And we’ve only scraped the surface… 🙂