Py2Exe Extractor Package

We have released the Py2Exe Extractor package for all licenses of Cerbero Suite.

py2exe is a Python package that converts Python scripts into executable Windows programs. The tool packages Python bytecode and the necessary libraries into a single executable file, eliminating the need for a Python interpreter to be installed on the client machine. py2exe works by analyzing the imported modules in the Python script and includes them along with a Python interpreter as a part of the generated executable.

The extractor supports all versions of py2exe and automatically identifies py2exe generated executables.

PyInstaller Extractor Package

We have released the PyInstaller Extractor package for all licenses of Cerbero Suite.

PyInstaller is a tool that packages Python applications into standalone executables, compatible with Windows, Linux, and macOS. It works by analyzing Python scripts to discover every import statement and include the appropriate Python files, binaries, and libraries in the executable. Additionally, PyInstaller converts all Python code into bytecode before packaging, enhancing performance and security.

The extractor supports all versions of PyInstaller, all supported file types and automatically identifies PyInstaller generated binaries. It also supports PyInstaller bytecode decryption.

Continue reading “PyInstaller Extractor Package”

PYC Format Package

We have released the PYC Format package for all licenses of Cerbero Suite.

PYC files are compiled bytecode versions of Python source code. These compiled files can be deployed in place of the original source code, serving as a bytecode format for execution by the Python interpreter. PYC files are tied to the specific version of Python they were compiled with, necessitating recompilation when different Python versions are used.

Continue reading “PYC Format Package”

DEX support

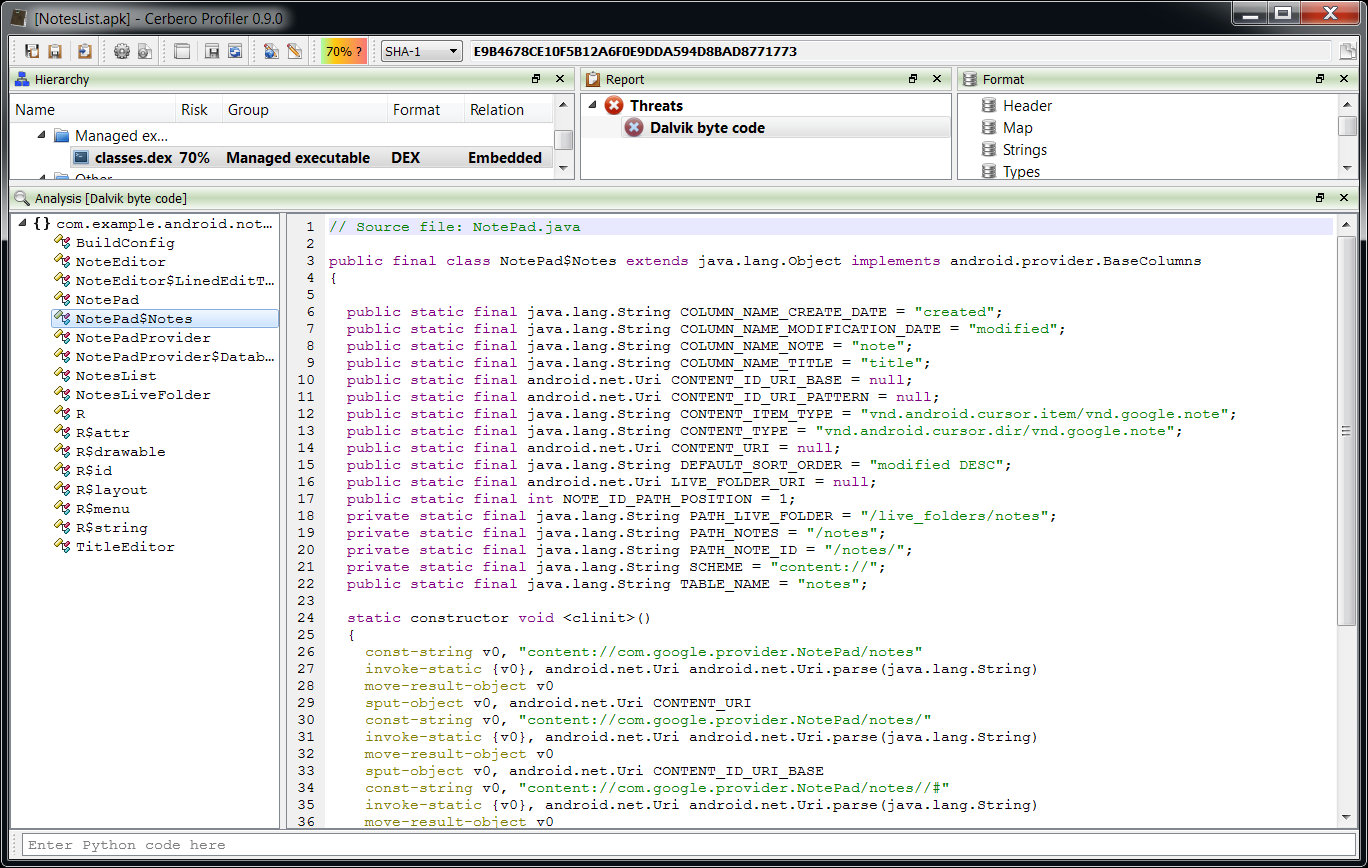
Support for Android’s DEX format is the last major feature of the upcoming 0.9.0 release of the Profiler. The support includes format, layout ranges and a Dalvik disassembler. Support for APK is implicit, since support for Zip archives has been added long ago.

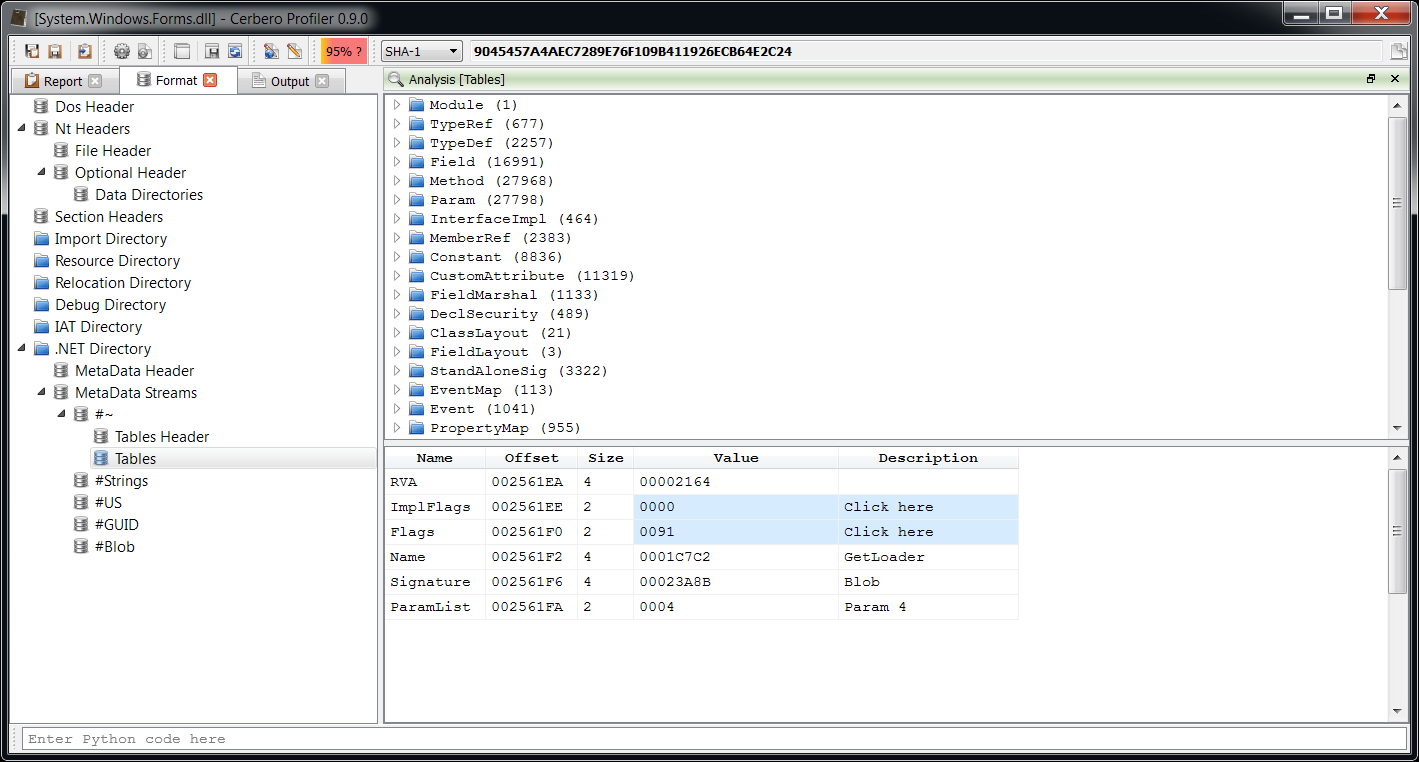
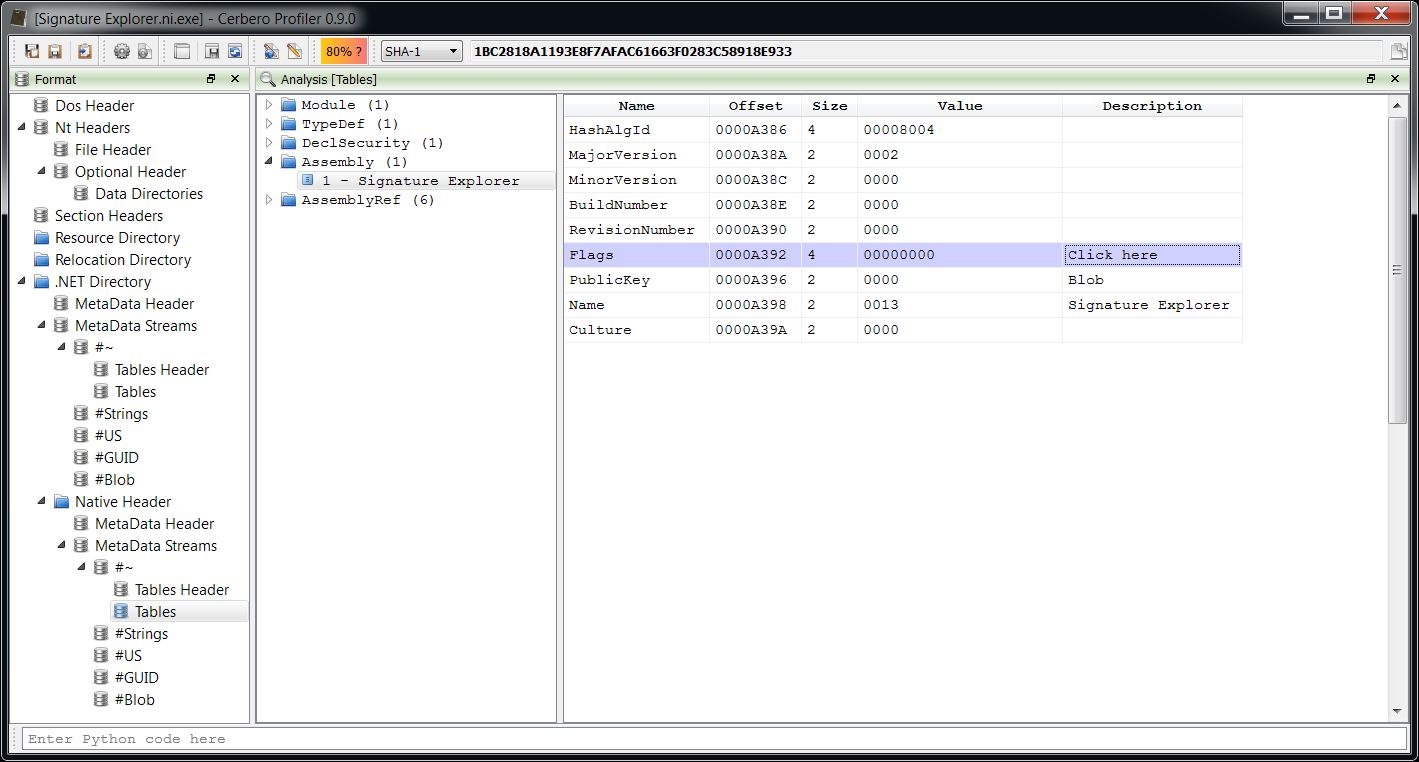
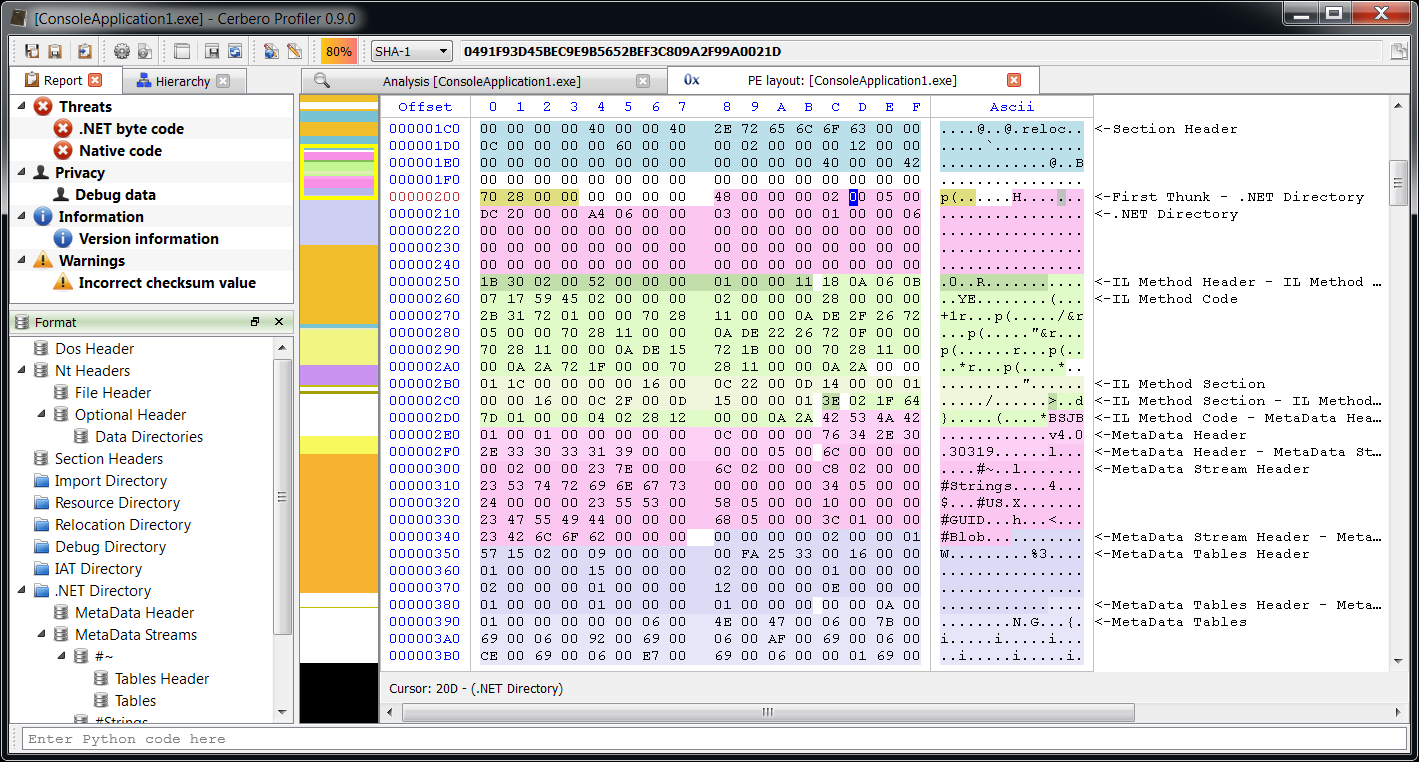
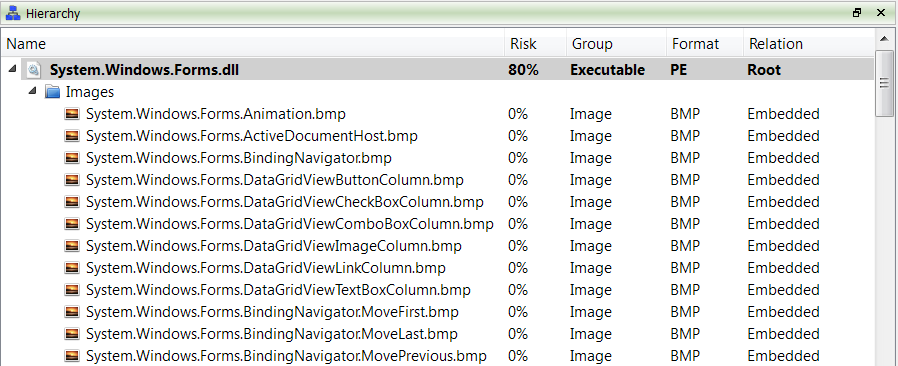
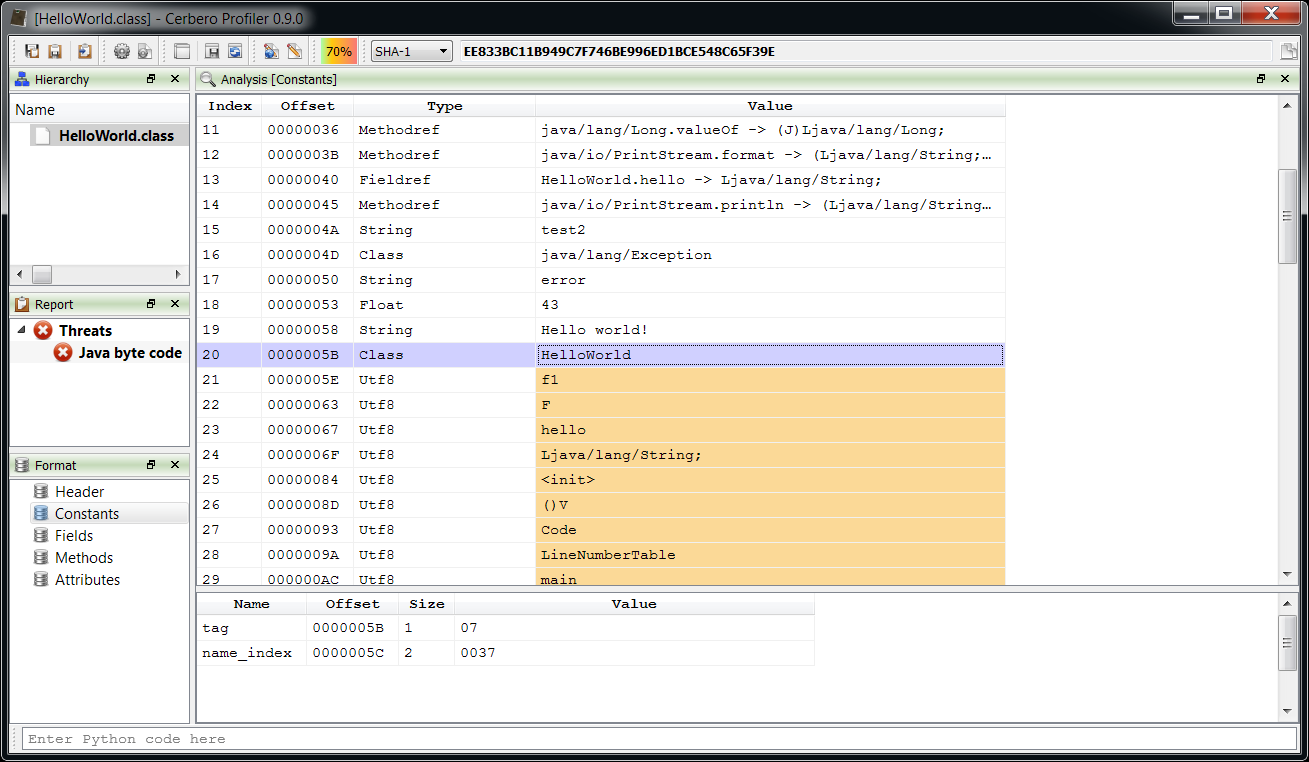
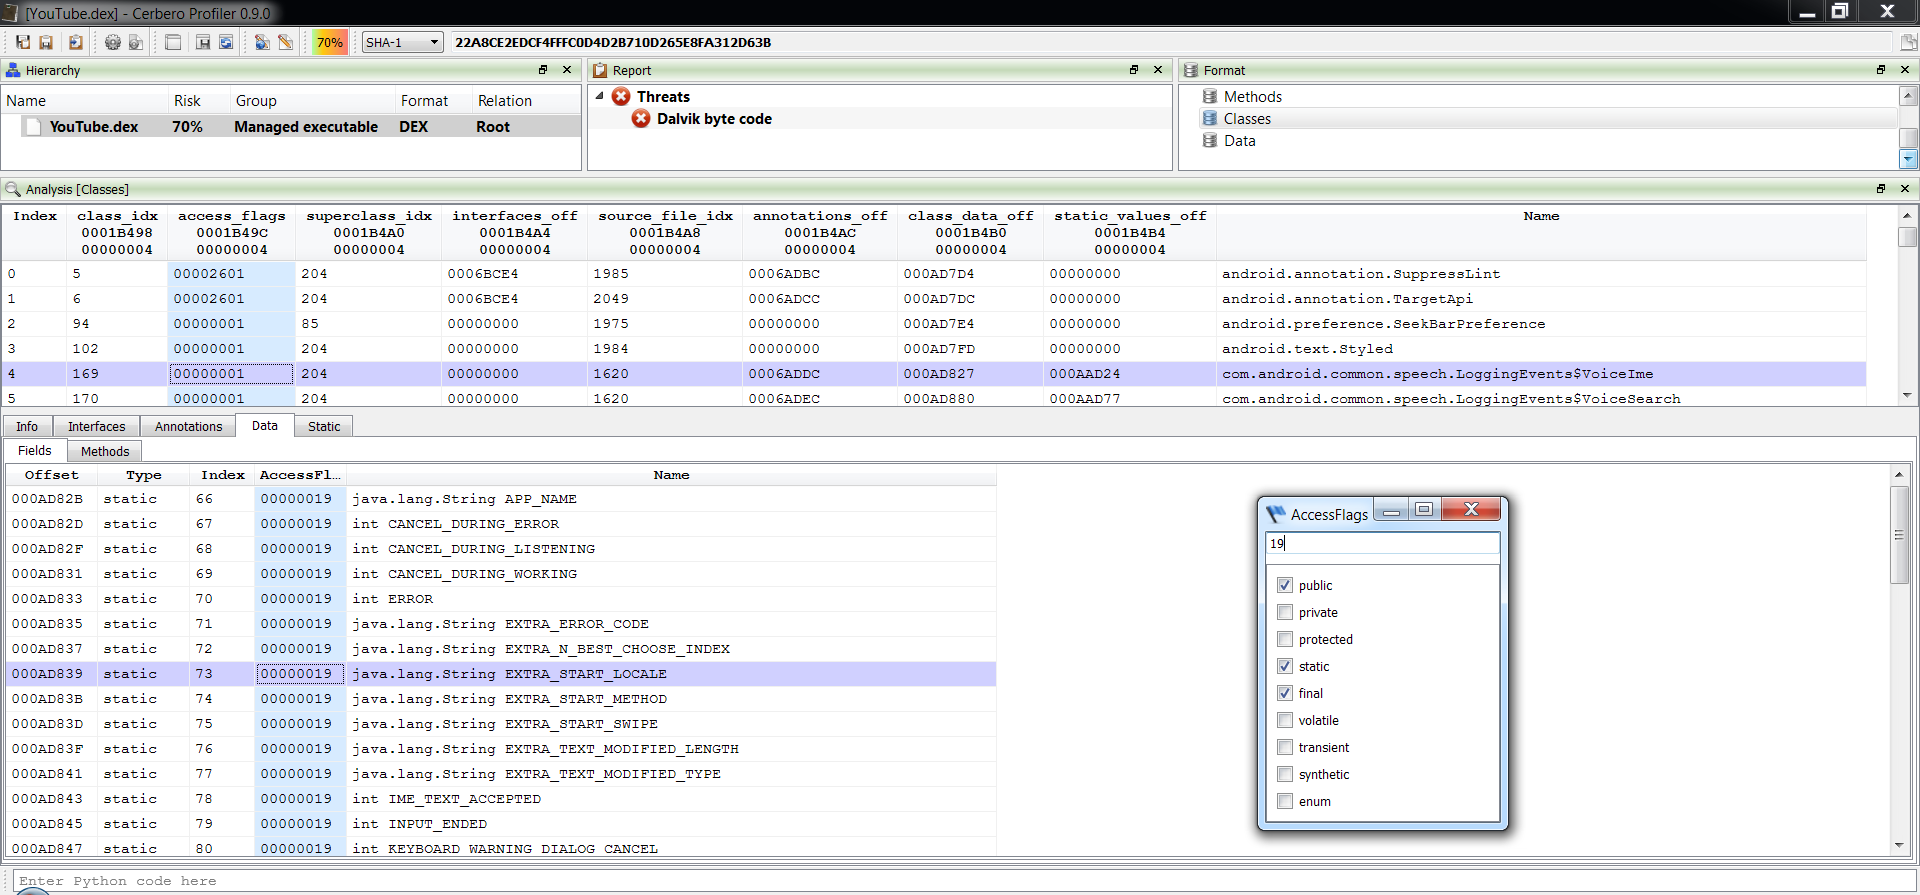
All sections of the format are accessible. The central point for parsing a DEX file is the Classes view. Hence it’s also the most complex view of the format.

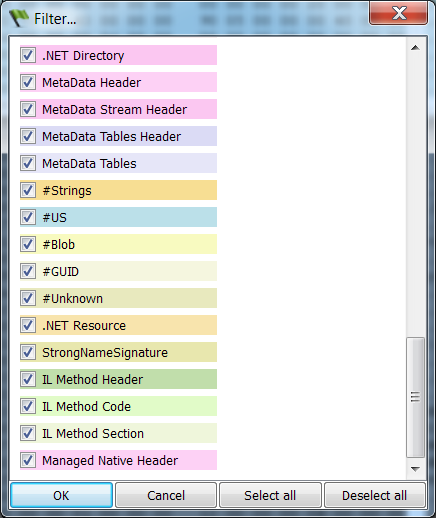
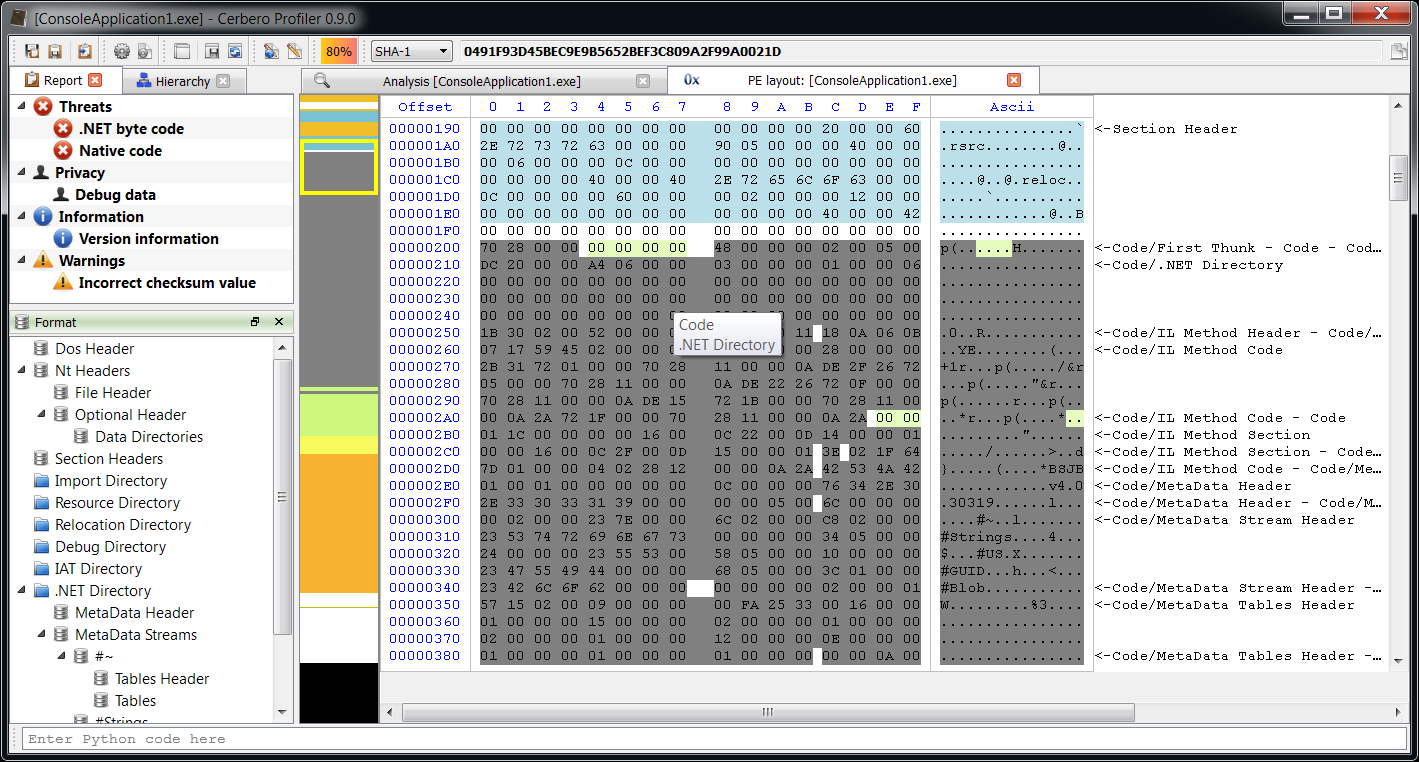
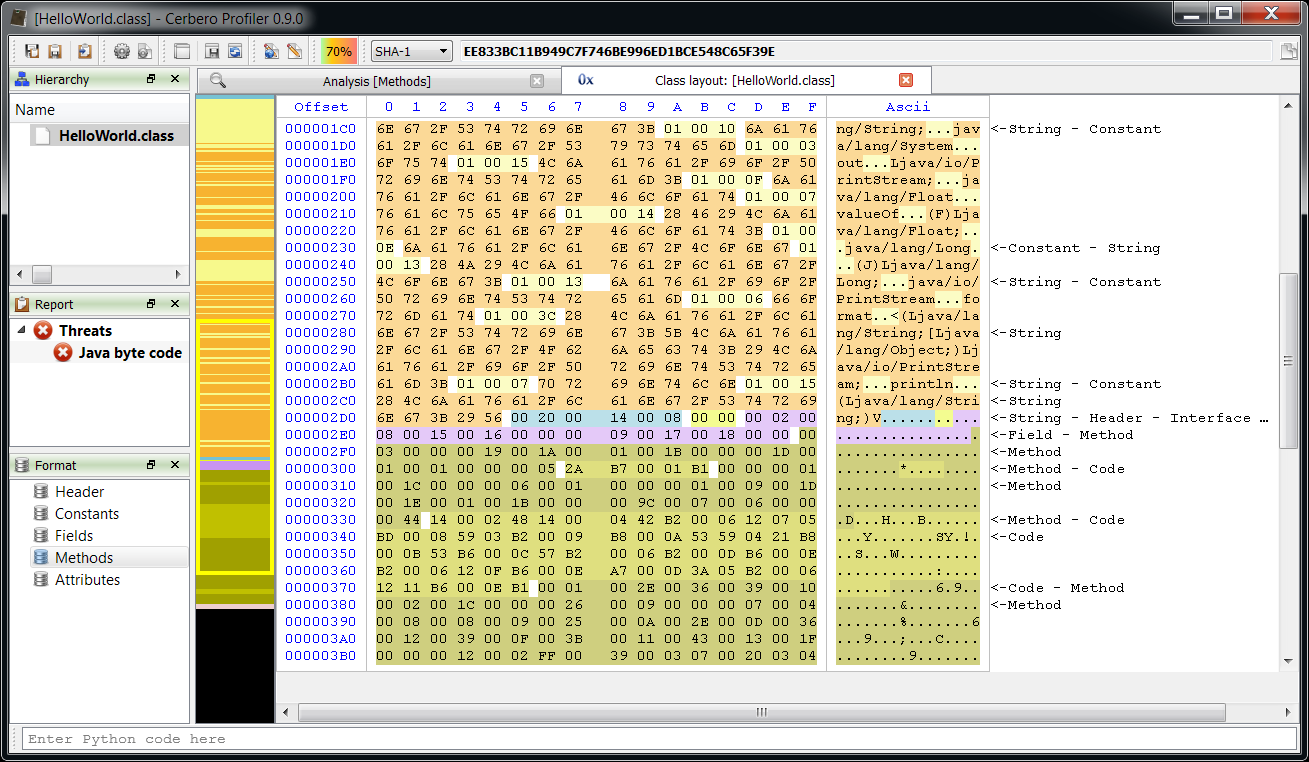
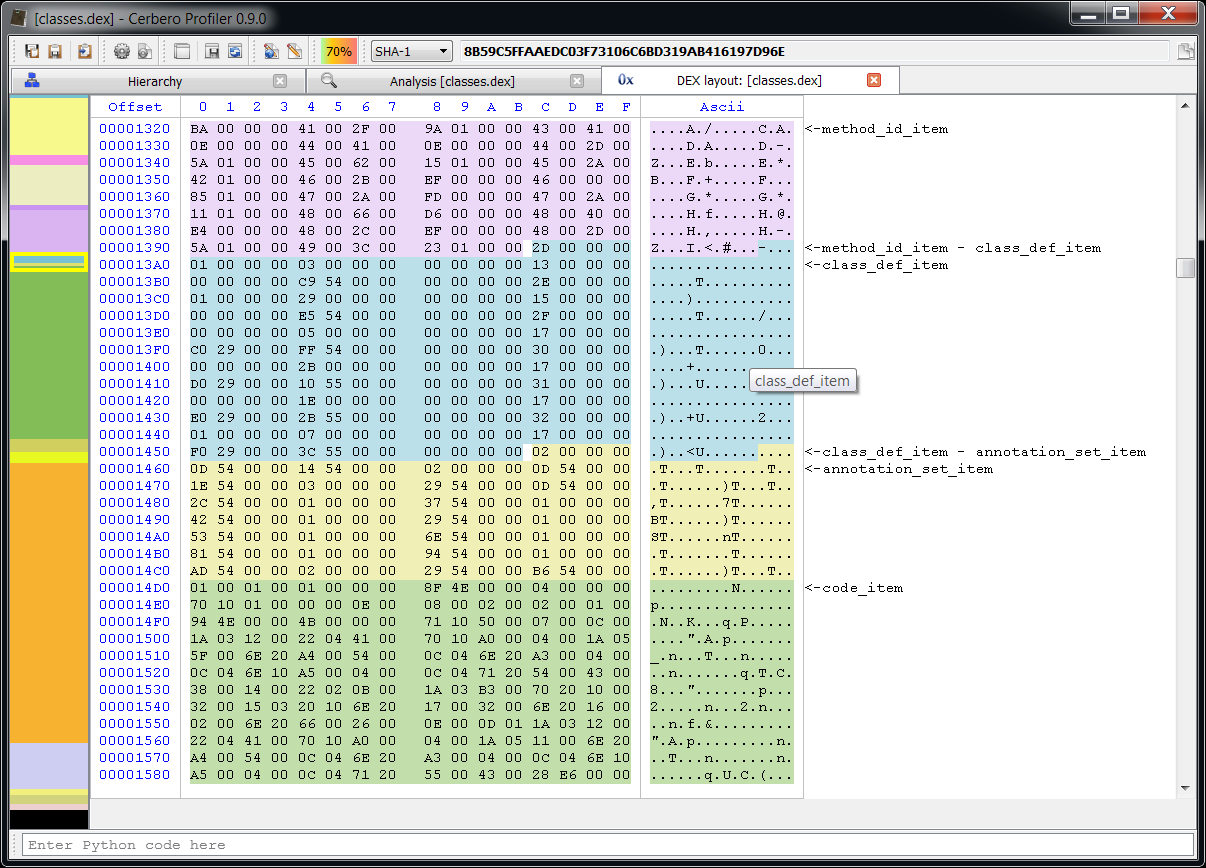
Also accurate layout ranges can help to analyze the format.

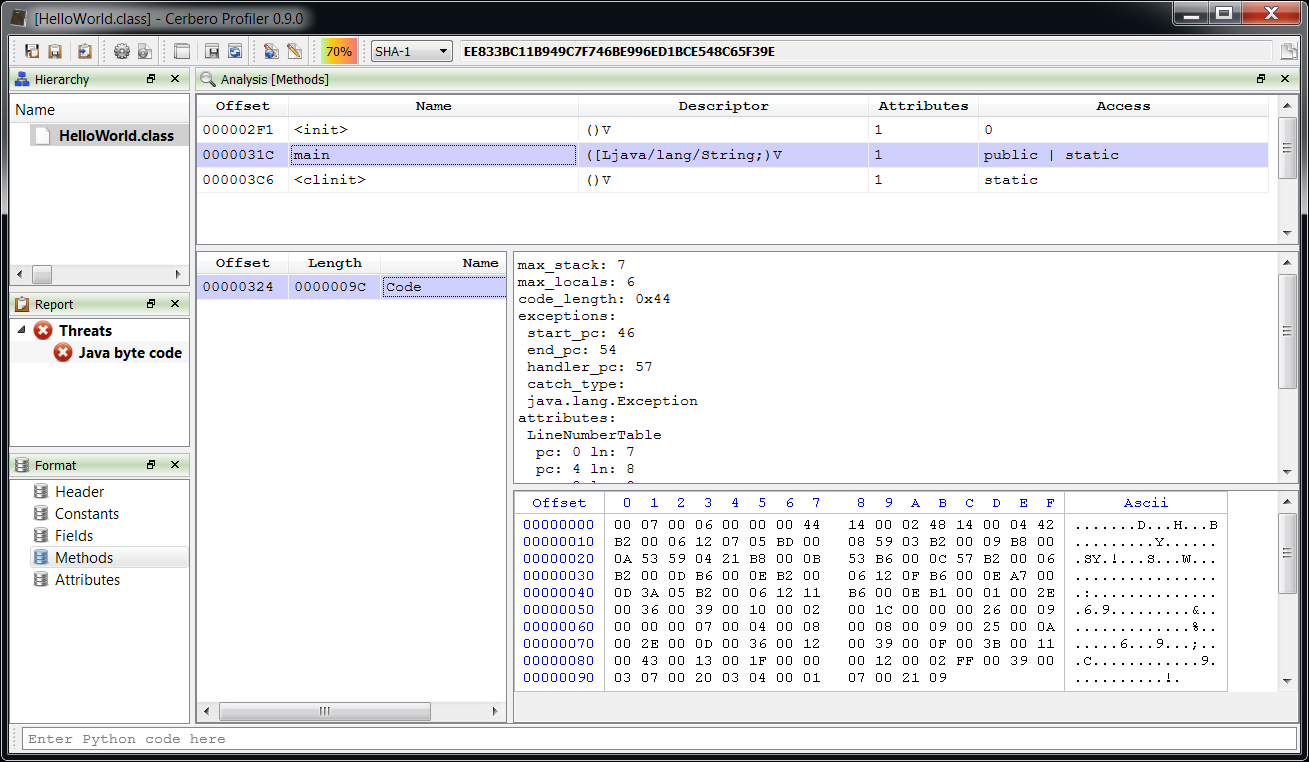
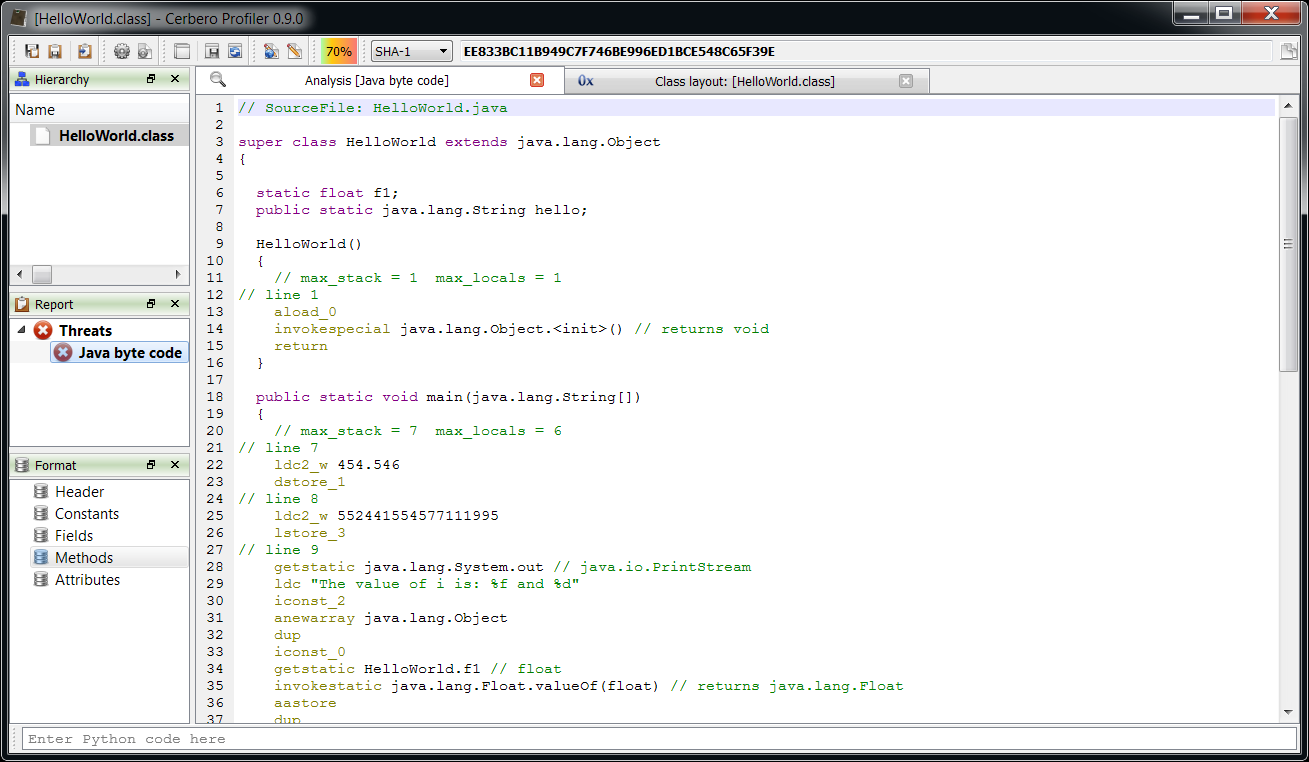
And finally a disassembler to quickly inspect the Dalvik bytecode.

Here’s a disassembled function from the Android SDK NotePad sample:

  private final void cancelNote()
  {
    const/4 v3, #int 0 // #0
    iget-object v1, v4, android.database.Cursor mCursor
    if-eqz v1, loc_74 // +34
    iget v1, v4, int mState
    if-nez v1, loc_90 // +38
    iget-object v1, v4, android.database.Cursor mCursor
    invoke-interface {v1}, void android.database.Cursor.close()
    iput-object v3, v4, android.database.Cursor mCursor
    new-instance v0, android.content.ContentValues
    invoke-direct {v0}, void android.content.ContentValues.()
    const-string v1, "note"
    iget-object v2, v4, java.lang.String mOriginalContent
    invoke-virtual {v0, v1, v2}, void android.content.ContentValues.put(java.lang.String, java.lang.String)
    invoke-virtual {v4}, android.content.ContentResolver getContentResolver()
    move-result-object v1
    iget-object v2, v4, android.net.Uri mUri
    invoke-virtual {v1, v2, v0, v3, v3}, int android.content.ContentResolver.update(android.net.Uri, android.content.ContentValues, java.lang.String, java.lang.String[])
loc_74:
    const/4 v1, #int 0 // #0
    invoke-virtual {v4, v1}, void setResult(int)
    invoke-virtual {v4}, void finish()
    return-void
loc_90:
    iget v1, v4, int mState
    const/4 v2, #int 1 // #1
    if-ne v1, v2, loc_74 // -11
    invoke-direct {v4}, void deleteNote()
    goto loc_74 // -16
  }

And the original source for comparison:

    private final void cancelNote() {
        if (mCursor != null) {
            if (mState == STATE_EDIT) {
                // Put the original note text back into the database
                mCursor.close();
                mCursor = null;
                ContentValues values = new ContentValues();
                values.put(NotePad.Notes.COLUMN_NAME_NOTE, mOriginalContent);
                getContentResolver().update(mUri, values, null, null);
            } else if (mState == STATE_INSERT) {
                // We inserted an empty note, make sure to delete it
                deleteNote();
            }
        }
        setResult(RESULT_CANCELED);
        finish();
    }

Next week will be dedicated to fixing reported bugs and adding some small improvements. After that and some testing the new version should be ready, so keep tuned as the new version should be deployed soon!

.NET support

Although there haven’t been customer requests for this, the upcoming 0.9.0 version of the Profiler adds support for .NET, which includes format, layout ranges and an MSIL disassembler.

As usual, let’s begin with the format itself. Since some users probably have used CFF Explorer to inspect the .NET format in the past, I have kept the same format view in the Profiler as well.

So how is it better than CFF Explorer? First of all, it’s very fast. There’s absolutely no wait time in opening a large metadata set as the following.

And then one handy feature which was not available in CFF Explorer, is the capability to display a second set of metadata. For instance, .NET native images (meaning those files in the assembly cache created with ngen.exe) contain two sets of metadata. The Profiler lets you inspect both sets.

Layout ranges cover all PE parts, so it was normal to add them for .NET as well. These are the ranges available for .NET:

Let’s see them in the hex editor.

If you’re asking yourself why it’s all gray, it’s because more ranges are blended together, meaning that all .NET metadata is contained in the .text section of the PE and that section is marked as executable even if the assembly contains only MSIL code. While it doesn’t make much sense to mark as executable a region of data containing strings and tables, my best guess is that old versions of Windows had no in-built support for .NET in the loader, which is why assemblies contain a single ‘mscoree.dll’ import descriptor and the entry point is just a jmp to the only IAT thunk (_CorExeMain for executables, _CorDllMain for dlls). That API then loads the .NET framework if necessary. Since that single native jmp instruction requires a section in the PE marked as executable and because the granularity of sections is the same as virtual memory pages, it was probably considered a waste to use an entire memory page just for a jmp instruction and so the result is that everything is contained into a single executable section. This could probably be changed as new versions of the framework do not even run on older systems.

However, for our inspection purposes it suffice to get rid of the Code range by pressing Ctrl+Alt+F.

We can now inspect .NET layout ranges without the conflict. One nice aspect about it is that the code of IL methods is easy to distinguish between its header and extra sections.

Included is also an IL disassembler. Its purpose is to let our customers quickly browse the contents of an assembly. As such readability was a priority and the output has been grouped for classes: I have always found it cumbersome in ILDasm to open every single method to inspect an assembly.

Here’s an output example:

  private static void Main(string [] args)
  {
    locals: int local_0,
            int local_1

    ldc_i4_2
    stloc_0 // int local_0
    ldloc_0 // int local_0
    stloc_1 // int local_1
    ldloc_1 // int local_1
    ldc_i4_1
    sub
    switch
      goto loc_22
      goto loc_60
    br_s loc_71
loc_22:
    try
    {
      ldstr "h"
      call System.Console::WriteLine(string) // returns void
      leave_s loc_81
    }
    catch (System.ArgumentNullException)
    {
      pop
      ldstr "null"
      call System.Console::WriteLine(string) // returns void
      leave_s loc_81
    }
    catch (System.ArgumentException)
    {
      pop
      ldstr "error"
      call System.Console::WriteLine(string) // returns void
      leave_s loc_81
    }
loc_60:
    ldstr "k"
    call System.Console::WriteLine(string) // returns void
    ret
loc_71:
    ldstr "c"
    call System.Console::WriteLine(string) // returns void
loc_81:
    ret
  }

And the original code:

        static void Main(string[] args)
        {
            int a = 2;
            switch (a)
            {
                case 1:
                    try
                    {
                        System.Console.WriteLine("h");
                    }
                    catch (ArgumentNullException)
                    {
                        System.Console.WriteLine("null");
                    }
                    catch (ArgumentException)
                    {
                        System.Console.WriteLine("error");
                    }
                    break;
                case 2:
                    System.Console.WriteLine("k");
                    break;
                default:
                    System.Console.WriteLine("c");
                    break;
            }
        }

There’s one last thing worth mentioning. .NET manifest resources are displayed as sub-files.

However, the parsing of ‘.resources’ files was still too partial and thus won’t be included in 0.9.0.

From the last two posts you may have guessed the topic of the upcoming release. So stay tuned as there’s yet more to come.

Java Class support

The upcoming 0.9.0 version of the Profiler adds support for Java class files. This will be especially useful for malware analysis. The support includes: disassembler, format views and layout ranges. Let’s see some screeshots of the format itself first.

Here’s a view of the constants:

Note: Utf8 strings are highlighted in orange just to distinguish them.

Here’s a view of the methods with their attributes:

And here’s the layout ranges view:

Again strings are in orange, while the actual code of a method is in a slightly lighter green than the method itself.

Since the format of class files is contiguous, it’s extremely easy to use layout ranges to create a new custom class file using the hex editor.

And finally, the disassembler:

The output shown in the screenshot above:

// SourceFile: HelloWorld.java

super class HelloWorld extends java.lang.Object
{

  static float f1;
  public static java.lang.String hello;

  HelloWorld()
  {
    // max_stack = 1  max_locals = 1
// line 1
    aload_0
    invokespecial java.lang.Object.() // returns void
    return
  }

  public static void main(java.lang.String[])
  {
    // max_stack = 7  max_locals = 6
// line 7
    ldc2_w 454.546
    dstore_1
// line 8
    ldc2_w 552441554577111995
    lstore_3
// line 9
    getstatic java.lang.System.out // java.io.PrintStream
    ldc "The value of i is: %f and %d"
    iconst_2
    anewarray java.lang.Object
    dup
    iconst_0
    getstatic HelloWorld.f1 // float
    invokestatic java.lang.Float.valueOf(float) // returns java.lang.Float
    aastore
    dup
    iconst_1
    lload_3
    invokestatic java.lang.Long.valueOf(long) // returns java.lang.Long
    aastore
    invokevirtual java.io.PrintStream.format(java.lang.Stringjava.lang.Object[]) // returns java.io.PrintStream
    pop
// line 10
    getstatic java.lang.System.out // java.io.PrintStream
    getstatic HelloWorld.hello // java.lang.String
    invokevirtual java.io.PrintStream.println(java.lang.String) // returns void
// line 13
    try
    {
      getstatic java.lang.System.out // java.io.PrintStream
      ldc "test2"
      invokevirtual java.io.PrintStream.println(java.lang.String) // returns void
    }
    catch (java.lang.Exception)  goto loc_57
// line 18
    goto loc_67
// line 15
loc_57:
    astore 5
// line 17
    getstatic java.lang.System.out // java.io.PrintStream
    ldc "error"
    invokevirtual java.io.PrintStream.println(java.lang.String) // returns void
// line 19
loc_67:
    return
  }

  static void ()
  {
    // max_stack = 1  max_locals = 0
// line 3
    ldc 43
    putstatic HelloWorld.f1 // float
// line 4
    ldc "Hello world!"
    putstatic HelloWorld.hello // java.lang.String
    return
  }

}

And the original source file:

class HelloWorld
{
  static float f1 = 43;
  public static String hello = "Hello world!";
  public static void main(String[] args)
  {
    double d1 = 454.545774;
    long l1 = 552441554577111995L;
    System.out.format("The value of i is: %f and %d", f1, l1);
    System.out.println(hello);
    try
    {
      System.out.println("test2");
    }
    catch (Exception e)
    {
      System.out.println("error");
    }
  }
}

There’s yet more to come. Stay tuned. 🙂